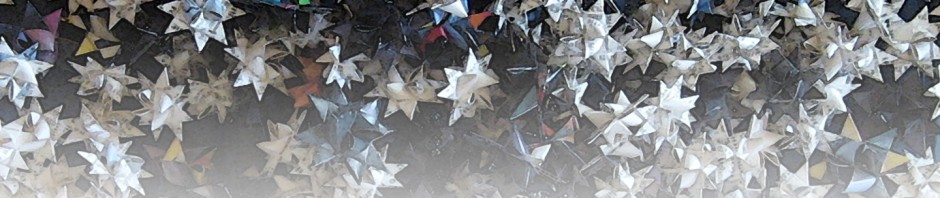
Today is Tanabata, at least in some places. It is also the official second anniversary of this blog and website, so it’s time for another DIY printable book project. In keeping with the star theme, it is a ‘star’ book, sometimes alternatively called a ‘carousel’.

If you want to make your own copy, first download the pdf and print it out.
I printed my copy on a laser printer, using the economy print setting so that the resulting images are matte rather than shiny. I used 67# (147 gm) cover stock and I let my printed pages sit for at least an hour so that the toner had a chance to harden.
The next step is to score the centre folds on all five copies of page one and on pages two, three, and four. The centre fold is marked by the dotted line indicated below by the green pointy fingers.

Image Two
After scoring all the centres, cut just the bottoms of the pages.

Now, fold in half, being careful to match the bottom edge. Don’t worry if the other edges don’t match as you will trim them later.
When all the folding is done, finish cutting your pages. The book will be assembled by making 5 sections with three layers each.

Image Four
The black page is indicated above by the green pointy finger, the mostly blue page by the pink, and one of the star map pages by the yellow. The black page is the narrowest and the star map page is the widest.
To make sure my cuts were uniform, I set up my paper trimmer for each width, but you can trim by hand. You can stack and cut all five pages at once to make sure that they match. I cut the fore-edge first and then the top, but it works the other way around too. The widths of the black pages and the blue pages are defined by the coloured areas, though you may want to trim just inside the edge. (See image 2 above. The cutting widths are indicated by the yellow pointy fingers.)
You should now have 15 folded and trimmed pages: 5 of the black, 5 of the blue, and one each of the star maps. The next step is to cut out the white shapes on the black and blue pages.

Piercing the corners of the rectangles and the points of the stars first reduces the risk of tearing and makes it easier to begin and end the cuts. The rectangles are cut from pierced corner hole to pierced corner hole. The stars are cut from pierced tip towards the centre.
Now the first step of assembly begins: mark a glue line on the backs of the pages first, about a quarter inch (.635 cm) in from the fore-edge. Apply glue only to this narrow strip at the fore-edge of the pages.

Glue a black page to a blue page, then that unit to a map page. Always make sure that the fore-edges are matched and all your pages are the right way up. You should end up with five units that look like the fourth image in this post. Now glue the five units together, still matching the fore-edges. The units go together in the same order that the star maps were printed: Nineveh 3300BCE, 14th Century Japan, Albrecht Durer, 19th Century France, 21st Century Canadian First Nations.
You now have a completed book block but it needs hinges, covers, and a closure.

Cut out the hinge strips and the tab parts. Glue the star parts of the two tab pieces back to back and trim the corners as shown in the above image. Cut out the cover parts leaving some white paper on the top and fore-edges. Using your book block as a guide, match the bottom and spine edges to the cover pieces and draw a pencil guide line on the other two edges. Trim.
Next, attach the hinges. Fold the hinge strips around the fore-edge of the book to create a square-cornered U shape. Glue the hinges on the spine edge of the book using the yellow marks on page 6 as a guide. The book is thinner at the spine edge, so the hinges will not hold it tight. They will hold the book so that it rests at the same thickness at the back as at the front.

Again, using page 6 as a guide, mark off the areas where you don’t want glue. This area should be about a half inch (1.25 cm) wide and longer than the legs of the tab. You are creating a slotted space between the cover and the book where the tab closure will fit. To make it easier to find the slot, mark the sides of the slot on the edge of the cover as well. If you make these marks in pencil, they can be erased later. The slot will be visible without them after the tab has been inserted and removed a couple of times.
Put glue all over the back of the cover pieces except the slot area, and attach to the book.
Score the tab closure on both sides just below the bottom tips of the star. When inserting to hold the book closed, the legs of the tab closure will have to be spread apart the thickness of the book. (See first image.)
To display the book in all its starry glory, remove the tab, open the book, and hold covers in position by re-inserting the tab closure.


You can read another Tanabata post on John Cutrone’s blog, Book of Days.
Enlightened Self-interest:
The Minnesota Center for Book Arts (MCBA) is a wonderful organization dedicated to promoting all aspects of the book arts. They are currently running a Kickstarter campaign to raise funds for what is likely the world’s largest collection of rubber stamps.

I would like to encourage people to contribute to this worthy cause. The enlightened self-interest comes in because if they raise funds to meet their goal, I will get a rubber stamp font based on items from their collection. ; ]


Very nice surprise! You sure think fast on your feet this little book is wonderful… Louise
LikeLiked by 1 person
Thanks. ; ]
LikeLike
Pingback: How To Make A Woven Book Structure | Byopia Press
Pingback: Byopia Press 2017 Advent Calendar: Day Eleven and two star books | Byopia Press
Pingback: The Faceted (Map) Ring | Byopia Press
Pingback: Star Book 2023 or Pages Don’t Have To Be Rectangular | Byopia Press